Photobucket

Photobucket

Photobucket

Photobucket
Photobucket

Monday, November 26, 2012

DIY Ombre Office Chair Slip-cover


So while black friday shopping, I was looking for a desk chair for when my dad and I finish making my desk and found this at a local thrift store for $13:


And of course I had to buy it considering I was looking into $40 chairs that look the same.

But I wasn't too fond of the print. Don't get me wrong, it's cute, but not exactly my taste. Lately I've been into ombre, and thought I would try dip dyeing some fabric for the first time for this project.

Considering it was my first ombre project, I think I did a decent job (Maybe?).

Materials I Used:

Two 25" x 23" pieces and two 23" x 17" pieces of white fabric -  or Add 7 inches to the length and width of your fabric
(I used Muslin which may have not been the best option but it worked well enough, and it was on sale!)
String or Cord
Fabric Dye
Bucket
Gloves

***I used two pieces of fabric because my fabric was sheer. You may only need one of each depending on your type of fabric. I only dyed one of each measurement and left the other all white.***

First, you'll need to dye your fabric. I used Teal Rit Dye. 


Boil 2 gallons of water and put it in a bucket/container. Pour 1/3 cup of your dye into the mixture and stir.


Put your fabrics about halfway in or to where you want the color to start. Let it soak for about five minutes.


After the five minutes, pull your fabric up to where you want the next color to go. Add another 1/3 of a cup and stir. Let it sit for 3-5 minutes.


Pull out your fabric some more and add another 1/3 of a cup. Let it sit for 3-5 minutes.


If you have a longer chair or you need a longer piece of fabric, you can add more layers of color by adding more die.

Pull the fabric out of your container and squeeze it out (make sure to wear gloves!) as much as you can and wash it in cold water. Hang over a bucket or the tub to dry out a little bit.


Now wash in the washer for a couple of minutes and hang to dry.

Once it is completely dry, line up your fabrics. Make rounded corners and pin for a 1-1/2 inch casing.


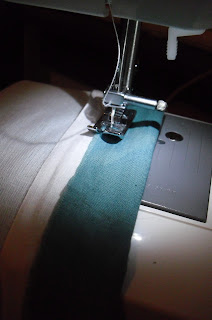
Sew. Don't worry too much if your fabric bunches up a little, the edges will be underneath the chair anyways.


Now, don't be stupid like me and forget to make a buttonhole before sewing the casing! If you do just cut a makeshift hole. Tie some string or cord to a safety pin and feed it through.


Fit your cover over your chair. Pull the string/cord as tight as you can and tuck the extra underneath the cover.


And now you have an almost new chair! :)


Special thanks to craftyjules.weebly.com for the inspiration on this project! She's amazing!

If you have a question I'd love to help :)


Monday, October 29, 2012

Beware of Christians


Probably one of the best documentaries/movies you will ever see. I watched this over the weekend with 3 friends and my sister. And let me just say - It is life changing. I've always been a christian and have been brought up as one. To be honest, when I was younger I was going through the motions. And after watching this, I've realized I've still been going through the motions. This documentary opened my eyes so much.

This documentary is following four college guys around Europe as they see what the world thinks of Christianity. I started watching it not knowing what to expect and now I honestly feel like a better person spiritually.

I could talk about this ALL day, but I really encourage you to watch it. It's about an hour and a half, and you can purchase it on their website or watch it on Netflix. It's funny and exciting and just simply amazing.


Thursday, October 25, 2012

DIY: Collared Tank Top from Old Blouse


Hi everyone! I'm so excited to post my first tutorial! Today I have a SUPER EASY one - And you don't even need a sewing machine. It's all hand sewing!

So my mom was about to give this shirt away:
And I stopped her because I knew I could do something with it, and I was right!

Materials Needed:
Old Blouse
Scissors
Sewing Kit with coordinating thread


First off I want to apologize for the bad quality photos.. I originally intended for this to be a video, so the pictures are screen captures from the video.

First off, cut out any shoulder pads if your shirt has some. I then cut a straight line to the seam where the sleeve meets the rest of the shirt.

I then cut out the rest of the sleeve, be sure not to cut off the seam!

Once you cut off both sleeves, your shirt should look something like this (if you cut it as poorly as I did)
Now I didn't have a picture for this so hopefully you'll understand. You're going to flip your shirt inside out, and fold back the sleeve to where you want to hem it.

Once you have it folded back, go ahead and press it.

Now it's time to sew! Just start the seam putting the needle through the flap of fabric you created. Using a simple basic stitch, continue to sew all the way around the circle. Try to stay as close to the edge towards the hole (if that makes sense) as possible. Tie off and secure your stitch and trim any excess fabric or thread.


And now you have a new tank top costing little to nothing depending on your materials!
Hope you enjoyed this tutorial!

Saturday, October 20, 2012

Beginner's Guide To Sewing

So while I'm no where near an advanced sewer, I decided to share some of my basic tips anyways. Knowing what's optional and what's required was a major thing for me when I first started sewing. If you're a beginner-- I hope this is helpful!

Sewing Machines

You don't need something fancy or expensive for it to be a good sewing machine. If you're on a strict budget like me, the Brother LX2500 Sewing Machine is perfect for you.

You can get it for $80 NEW at Walmart. It's an EXCELLENT machine for the price. It has a drop-in bobbin (which I love), 17 different stitches, 4 different presser feet, and you can wind the bobbin right on the machine.
If you are looking for an investment, Singer, Janome, and Bernina are other good brands of sewing machines.

Some Random Essentials

Some things I would recommend you getting:
  • Seam Ripper: You can get one from 2-5 dollars at amazon.com, Walmart, Craft stores, etc. I have a love/hate relationship with them. Their great when you mess up, but I get frustrated when I mess up and have to use one.
  • Rotary Cutter: This is your best bet for cutting evenly on fabric. You can purchase one for $9 at Walmart.
  • Cutting Mat: This is completely optional, but very helpful when measuring and cutting. You can purchase this at Walmart for $13 for a 12"x 18"
  • Straight Pins: These make your life so much easier. You can hold things in place and get a little preview of how the outcome may be. They can be purchased for 2-5 dollars depending on how many you may want.
  • Extra Bobbins: Just for the sake of it. You can get a 10 pack for $2 on amazon. 

Thread

I recommend all purpose thread. I don't really use a specific kind. There's polyester, cotton, and a bunch of other different kinds. Thread is sometimes not very cheap, but you can buy sets. 

You can get a set of 50 different colored threads from Joann's ranging from $32-$64 depending on if it's on sale or not.
You can also find a lot of good deals on thread on amazon.com.

Fabric

The type of fabric you use depends on the project you are working on. There are TONS of different types of fabrics. You can get it from a lot of different places too.

My favorite place is Hancock's Fabric. Joann's, Hobby Lobby, and Walmart also have great choices.

Needles

Just like fabric depends on the project, needles depend on the fabric. There are different types you can buy. A standard needle that usually comes with the machine will work for most fabrics. With other types such as leather, you'll need a stronger, more durable needle that you can purchase at Craft stores. They will be labeled so you can know the fabrics that can be used with it. 


This is your basics you should know for beginning sewing. I hope I helped answer any questions and if I left anything out or you have a question feel free to leave a comment or contact me! :)